Sunday, November 21, 2010

CHRISTMAS IS A COMIN' BUT NO GOOSE IS GETTIN' FAT HERE!


Winter has come to our area. Not ready for it, but sure does make things look pretty with snow on them. Look at this beautiful art Mother Nature left on my porch early this morning! Would love to try free motioning something like that someday.A few days ago it was cold outside but still some fragrant roses on my lovely arbor. I've been so happy to have this strong rosebush survive and bring me such joy.


The thought of eating goose or duck has always made me ill. For years I didn't know why until Mom reminded me of this experience...my father worked building trades when I was an eight year old and broke his arm that year with unemployment benefits not available to him. The only income was from my mom selling RealSilk door to door. (anyone remember that company?) As a result, we had enough to pay rent and that was about it. We did have a freezer locker full of geese and ducks my father had shot earlier in the year and had that for breakfast, lunch and dinner for about two months. I really don't remember eating the foul fowls, but obviously, it's instilled in memory!! Another fowl, however, is residing at my house for now...below are a couple sneak peaks.

Here's some more fowls living at my house right now. Aren't they adorable along with their snowman and snowwoman cohorts? They're from Bunny Hill's free Snowbound BOM. So far 11 blocks are done and I'm anxiously awaiting number 12. This week I'm working on the 13 blocks that will go between the snowbuddies ones. Will probably not be doing what the BOM suggests,
but we'll see.
Here's where I am so far on the ladybug quilt along at Ivory Spring. I changed things by halving all the sizes of each block, and used fabrics I had on hand. Aren't those Betty Boop corners just adorable? They worked out to be the exact size needed...is that cool or what?
Home Tweet Home was a BOM started last year, but I found it earlier this year as a completed pattern set that I couldn't resist. Wasn't sure I'd be able to do the applique by hand with old, old hands, but it worked well. I don't know what it's called, but I sewed light fusible pellon (right sides together) to each piece then turned them and ironed them in place. Took all the pieces to the ocean in September and turned and pinned them there. For the small berries, I made tiny yo yos for the best results. There are eight blocks of different sizes and some have darling pieced sections to them. Not sure this will get done before Christmas and at this point it's mine!! My daughter thinks it would look great on her living room wall, but for now all that work and the cuteness of it all means it's home tweet home is here!
Went to western Washington for boyly boy Adam's baptism. Got some really good pictures with my phone of him with his mom, dad and baby brother, Spencer. Trey (10 years old) gave a talk on baptism that was so great. Girlie girls, Sabrina and Sydney (they ARE twins) in the beautiful dresses Diannalynn made. And beautiful Sagie played all the music for the program. What a great weekend we had.
Cute Chef Gavin at his "kitchen" that fits conveniently under his mom's kitchen counter. His toque is from a free pattern I found online last year. He wouldn't have anything to do with it at the time--had to be bribed with a peanut butter sandwich to even try it on, but the other day he popped it on his head himself and Jenny got a quick picture while he was baking one of his Toy Story toys! The picture of my Adam and girlie girl Olivia was in Philadelphia last month. I love how she's grabbing Daddy's sleeve; what a sweetie pie!
The last picture is the head of one super cute and rambunctious little Spencer. Are those curls wonderful or what? He's so fun and just a joy to be around. Makes my life so full to have all these fantastic grandchildren to adore and Christmas time can't come soon enough for me to enjoy my whole family here.

Friday, October 29, 2010

BLOGGERS QUILT FESTIVAL--OLIVIA'S QUILT

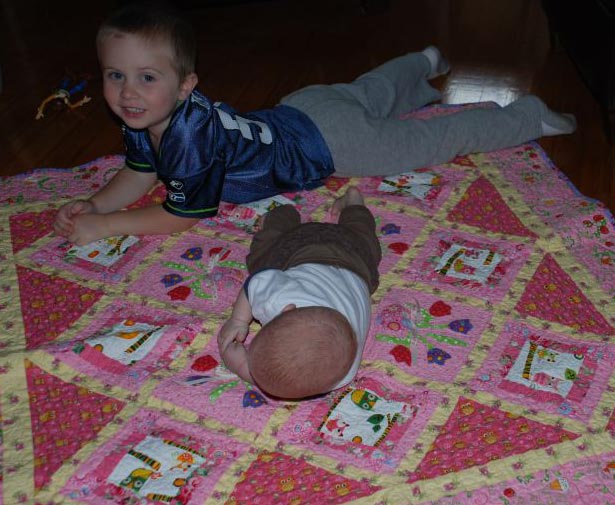
Cutie pie Olivia on her quilt today!!


Oh, Gramma! Sure do love my quilt says little girlie girl!

This is Olivia's quilt and it's my entry for the Blogger's Quilt Festival going on at Amy's Creative Side blog: http://amyscreativeside.com/2010/10/29/bloggers-quilt-festival-fall-2010/ (I know someone told me how to do that correctly, but can't for the life of me remember!!) It's a very vibrant quilt, but doesn't show up as well in this picture that was taken on a rather dreary day.

Olivia is my newest girlie girl (it was Seahawks game day) and was the inspiration for the quilt. Wendy at Ivory Spring (http://ivoryspring.wordpress.com/) had her Marabella quilt in the spring festival and I just loved it, so was ecstatic when Olivia was born and I had a super excuse to get the pattern. I fell in love with several quilts that featured owls during the spring festival also, and got a couple pink owlie fabrics to use in it.
About had a heart attack when hubby sent the picture of Starsky (grandpuppy) and his claws on the quilt! Like the picture of Olivia and Gavin enjoying the quilt together a lot better! Randy was visiting my son and family when the quilt arrived at their home in New York a couple months ago.

This is my first effort to really do free motion quilting and am happy with how it turned out. There are different kinds of things in each section...sort of meandering wiggles in the owlie triangles, outlining in the square owlie blocks and a different design around each of those--stars in one, words in another, etc. It's so far from perfect, but it was a lot of fun. The pattern was great to work on and came together quite easily. Last picture is my oldest girlie girl showing off the back of the quilt with lots of different fabrics in the "coins" that are from quilts made over the last year or so. I've posted about the quilt before and showed some of the process pictures that I could without showing too much before it got to Olivia. (just added the three photos on the top after ddil sent a bunch to me today)

Thursday, October 28, 2010

ADORABLE PYRAMID BAGS


Four pyramid bags (also called teepee bags) sewn today. Aren't they just darling? My friend Shirley, gave me the pattern quite awhile ago. She'd sewn one but for the life of me, I can't figure out how she did it from just the directions! I found a tutorial on flickr http://www.flickr.com/photos/cascioli/398244195/ . Was hoping for a video, but this worked ok...still found it a bit difficult. The sewing is all straight lines, it's just the directions that confused me, so I decided if four were needed to get them done at one time! This isn't a tutorial, just hoping if you want to make one, these pictures help some!

Left above shows topstitching. It's not entirely necessary and doesn't go the length of the zipper as I couldn't figure how to do it, but it keeps the material from getting into the zipper. Right is a finished bag...isn't that material just darling? Came from Attic Window Quilt Shop. Below left are straps for two of the bags--one pressed, the other finished. Right is inside of the flowery bag.


The left above is the first side of the zipper to be sewn, the right one is after both sides of the zipper are sewn, the sides are ready to be sewn on the bottom (right in the picture). I found it was easiest to sew the zipper with it open. It has to be closed to do the bottom stitching and then you cut off the extra.

Below left is the strap sewn to the outside material...I always super sew straps and tops and bottoms of zippers as those are where all the stress is. Right is inside and outside with zipper closed after sewing them together.
This is with zipper opened. Pull the two materials out so they're touching themselves. You then sew it with the zipper tops touching each other, and from the owlie side here, across the zipper tops (sew back and forth) and then over to swirly material side but leave about three inches open. See the pinky one which really doesn't have a big enough opening showing there on the left so I had to unpick some stitches (one set of directions said to leave one inch open--all I can say is, HA!). Just makes it a lot easier to pull everything through if it's bigger.
Blue swirly is fuzzy picture, but shows the top stitching to close up the lining of the owlie bag. Have fun making these if you want to. I think they're just so cute!! Here's four bags made for my boyly boys on Oct. 30th. Thinking of fun things to put inside these marvelous little bags for my dear grandchildren.

Sunday, October 24, 2010

MITERED BIAS CORNERS

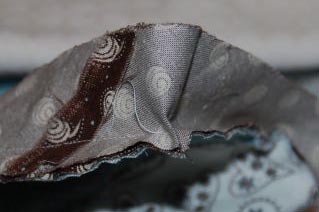
This is part of a Christmas project I'm working on. Made continuous bias tape for the first time awhile ago...LOVE making it! Used some of it on the potholders posted about earlier. The first image is the back side of the bias and is the miter that I got after much playing with it all and hand stitching the corner parts together. The machine sewing directions are from Sew4Home's site.
This is inside the corner when it's been sewn and before turning over to other side.

This shows the miter that's formed sort of naturally after sewing. There are six corners on this project, so got plenty of practice!

This corner is on what is actually the front of this particular project, but I've figured out I should have paid attention to the directions and sewn it on the back so the natural miter would be on the front!! Lots of pins to hold everything in place. The pink pin in the corner is where the hand stitching started. After handsewing the corner miters into place, I'll do the rest on the machine with a decorative serpentine stitch as I did on the potholders.
Isn't this the cutest fabric!! I just love this Pure fabric by Sweetwater from Moda. I got three charm packs and then ordered a yard or two of several of the fabrics in the line...would just love to have some of a lot more of the variety. Some came from fabric.com, but I found the blue with the little brown flowers at a relatively local quilt shop and she was so nice to send it to me...called Woven Threads in Chelan, Washington. One day hope to actually get there as I'm very impressed by her quickness and customer service.
Look at that adorable ampersand fabric!! I just love it, but there are very few of the fabrics in the line that aren't just wonderful. This is a bit fuzzy as it was taken by my cell phone while the others were taken by sweet hubby with his nice camer!! It shows the handsewn corners. This particular bias is not as wide as the other I made, but it's on a child-sized project. It's about 1 1/2 inches wide while the bias for the adult is 2 inches wide. The pattern called for extra wide double fold. This was a pdf file that I printed and in order to make the child sized ones, I just set my printer to print two of the pattern pieces per page instead of one and it worked really well. I tried to make a teeny sized one for my littlest grandchild, but couldn't figure out how to do that through the printer, so tried to copy it by using thin paper and sizing the pdf to 25%...not sure if that's worked or not as the pieces haven't been glued together yet. Hopefully, it will work! I love experimenting with things like this.

Tuesday, October 19, 2010

CHRISTMAS QUILT PROGRESS & STACKS

This is the latest part of making up my Christmas quilt. I made about 30 different blocks with directions from the book I mentioned, things seen online and other ideas I found. Can you tell that wonky stars are a favorite? A few of the squares turned out a lot larger than can really be used in this project so will probably be pillows or tiny quilts unto themselves.


Am doing a lot of experimentation with placement and thinking there might have to be more squares, but there just might be some open areas that have embroidered Christmas sayings on them!! Will see. I had a lot of fun making all these squares up--like doing that to figure out if it's something a whole quilt would be to my liking. The material is mostly from a layer cake by Kate Spain for Moda. The colors are wonderful and look pretty good on here (taken with phone outside on deck bench). Don't have any idea about the other fabrics.
I know this isn't anything to do with quilting, but wanted to share this cool picture dh took today for me...it's stacked rocks someone did right off the highway on the way to our home. I hope they last for a long time. Usually, I zip past this area because BIG rocks occasionally come down there and deer are often seen/hit here. Mostly, I drive in the left lane near here but yesterday coming back from lunch I was in the right lane and happened to glance over to see this fun sight! A friend said someone has made similar stacks in the city park a few miles up the road. Whatever induced someone to do it, I'm thankful...a little piece of whimsy to enjoy. So, thanks to them!