.JPG)
This is part of a Christmas project I'm working on. Made continuous bias tape for the first time awhile ago...LOVE making it! Used some of it on the potholders posted about earlier. The first image is the back side of the bias and is the miter that I got after much playing with it all and hand stitching the corner parts together. The machine sewing directions are from Sew4Home's site.

This is inside the corner when it's been sewn and before turning over to other side.
.JPG)
This shows the miter that's formed sort of naturally after sewing. There are six corners on this project, so got plenty of practice!
.JPG)
This corner is on what is actually the front of this particular project, but I've figured out I should have paid attention to the directions and sewn it on the back so the natural miter would be on the front!! Lots of pins to hold everything in place. The pink pin in the corner is where the hand stitching started. After handsewing the corner miters into place, I'll do the rest on the machine with a decorative serpentine stitch as I did on the potholders.

Isn't this the cutest fabric!! I just love this Pure fabric by Sweetwater from Moda. I got three charm packs and then ordered a yard or two of several of the fabrics in the line...would just love to have some of a lot more of the variety. Some came from fabric.com, but I found the blue with the little brown flowers at a relatively local quilt shop and she was so nice to send it to me...called Woven Threads in Chelan, Washington. One day hope to actually get there as I'm very impressed by her quickness and customer service.

Look at that adorable ampersand fabric!! I just love it, but there are very few of the fabrics in the line that aren't just wonderful. This is a bit fuzzy as it was taken by my cell phone while the others were taken by sweet hubby with his nice camer!! It shows the handsewn corners. This particular bias is not as wide as the other I made, but it's on a child-sized project. It's about 1 1/2 inches wide while the bias for the adult is 2 inches wide. The pattern called for extra wide double fold.

This was a pdf file that I printed and in order to make the child sized ones, I just set my printer to print two of the pattern pieces per page instead of one and it worked really well. I tried to make a teeny sized one for my littlest grandchild, but couldn't figure out how to do that through the printer, so tried to copy it by using thin paper and sizing the pdf to 25%...not sure if that's worked or not as the pieces haven't been glued together yet. Hopefully, it will work! I love experimenting with things like this.

.JPG) This is part of a Christmas project I'm working on. Made continuous bias tape for the first time awhile ago...LOVE making it! Used some of it on the potholders posted about earlier. The first image is the back side of the bias and is the miter that I got after much playing with it all and hand stitching the corner parts together. The machine sewing directions are from Sew4Home's site.
This is part of a Christmas project I'm working on. Made continuous bias tape for the first time awhile ago...LOVE making it! Used some of it on the potholders posted about earlier. The first image is the back side of the bias and is the miter that I got after much playing with it all and hand stitching the corner parts together. The machine sewing directions are from Sew4Home's site.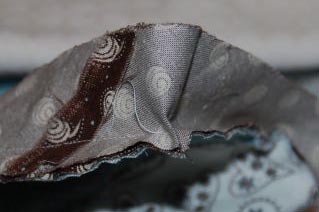 This is inside the corner when it's been sewn and before turning over to other side.
 .JPG) This shows the miter that's formed sort of naturally after sewing. There are six corners on this project, so got plenty of practice!
This shows the miter that's formed sort of naturally after sewing. There are six corners on this project, so got plenty of practice! Isn't this the cutest fabric!! I just love this Pure fabric by Sweetwater from Moda. I got three charm packs and then ordered a yard or two of several of the fabrics in the line...would just love to have some of a lot more of the variety. Some came from fabric.com, but I found the blue with the little brown flowers at a relatively local quilt shop and she was so nice to send it to me...called Woven Threads in Chelan, Washington. One day hope to actually get there as I'm very impressed by her quickness and customer service.
 Look at that adorable ampersand fabric!! I just love it, but there are very few of the fabrics in the line that aren't just wonderful. This is a bit fuzzy as it was taken by my cell phone while the others were taken by sweet hubby with his nice camer!! It shows the handsewn corners. This particular bias is not as wide as the other I made, but it's on a child-sized project. It's about 1 1/2 inches wide while the bias for the adult is 2 inches wide. The pattern called for extra wide double fold.
  This was a pdf file that I printed and in order to make the child sized ones, I just set my printer to print two of the pattern pieces per page instead of one and it worked really well. I tried to make a teeny sized one for my littlest grandchild, but couldn't figure out how to do that through the printer, so tried to copy it by using thin paper and sizing the pdf to 25%...not sure if that's worked or not as the pieces haven't been glued together yet. Hopefully, it will work! I love experimenting with things like this.


1 comment:
Oh wow.....love what I see so far, hopefully, you will post all of it soon.
Post a Comment